
A wrought iron fence adds elegance and durability to your property while providing security and a timeless aesthetic. Whether you're enhancing curb appeal or creating a defined boundary, installing one yourself can be a rewarding project that saves money and ensures a custom fit for your space.
For a flawless and long-lasting installation, professional expertise is key. With the right tools, materials, and a well-planned approach, you can ensure your outdoor area is enhanced with a stunning and durable fence. Understanding the process beforehand helps streamline installation and prevents common mistakes.
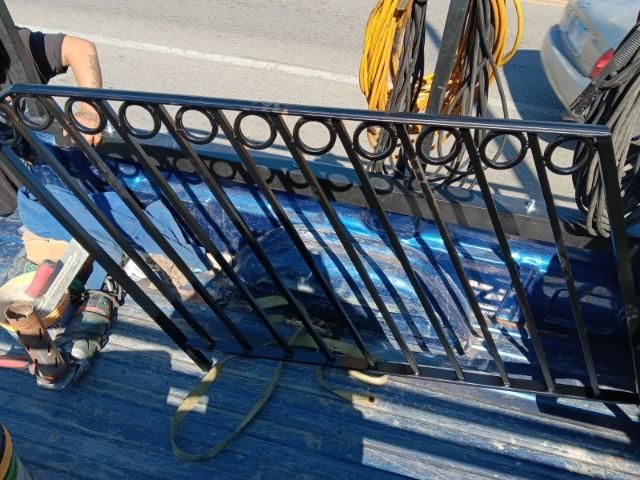
Materials And Tools Needed
Gathering the correct materials and tools ensures an efficient installation process for your wrought iron fence. Organize everything at the outset to avoid interruptions.
Essential Materials
Wrought iron panels and posts: Select panels that match the style and dimensions you prefer.
Concrete mix: Support fence posts securely with a concrete footing.
Gravel: Add a base layer for drainage under the concrete.
Fence brackets and screws: Connect panels to posts firmly using sturdy brackets.
Paint or coating (optional): Touch up or protect the metal against corrosion.
Required Tools
Post hole digger or auger: Create even, deep holes for securing fence posts.
Level: Ensure posts and panels are perfectly aligned vertically and horizontally.
Measuring tape: Measure spacing accurately between fence panels and posts.
Drill and screwdriver: Attach brackets to posts efficiently.
Rubber mallet or hammer: Position fencing components gently without damage.
Shovel: Prepare the ground for an even installation surface.
Protective gear (gloves, safety glasses): Protect your hands and eyes during installation tasks.
Preparing For Installation
Proper preparation ensures accuracy and prevents issues during the installation process. Follow these steps carefully to set a strong foundation for your wrought iron fence.
Planning And Measuring The Area
Define the installation area clearly to avoid errors in placement. Measure the perimeter of the area using a measuring tape, ensuring precise measurements for panel and post placement. Identify any slopes or obstructions that may require adjustments to the fence layout. Maintain a consistent spacing between posts, typically 6-8 feet apart, depending on the design of the wrought iron panels.
Marking The Fence Line
Mark the fence line to guide the installation process. Use stakes and string to outline the perimeter of the fence clearly. Place stakes at each corner and align the string tightly between them to establish a straight line. Ensure the alignment is level and adjust any irregularities before proceeding. Use marking spray to indicate the exact locations for post holes along the line to maintain uniformity.
Obtaining Necessary Permits
Check local regulations to determine the need for permits. Contact your local building department to confirm zoning laws, setback requirements, and height restrictions for fences in your area. Acquire the required permits before starting to avoid legal issues. Retain copies of permits at the site during installation to demonstrate compliance if questioned.
Installing The Fence Posts
Precise installation of fence posts is crucial for the stability and appearance of your wrought iron fence. Follow these steps carefully to ensure a secure and long-lasting result.
Digging The Post Holes
Create post holes at the marked locations using a post hole digger or auger. Each hole should be approximately 6-8 inches in diameter and 24-36 inches deep, depending on the frost line in your area. Remove any loose soil or debris to ensure the holes are clean.
Setting The Posts In Concrete
Place the first post into the hole and fill it halfway with gravel for drainage. Prepare the concrete mix, then pour it into the hole until it reaches ground level. Use a trowel to smooth the surface. Repeat the process for each post, working one at a time to prevent misalignment.
Checking For Alignment And Level
Check the alignment of each post using a string line stretched across the tops of the posts. Adjust the posts as needed before the concrete sets. Use a level to confirm the posts are plumb vertically. Allow the concrete to cure for 24-48 hours before continuing with the fence panel installation.
Attaching The Fence Panels
Connecting the wrought iron fence panels to the posts completes the installation process. Accurate positioning and secure fastening are essential for durability and appearance.
Positioning The Fence Panels
Align each fence panel with the posts to ensure consistency and accuracy. Check the measurements between posts against the panel length to confirm compatibility. Position the panel at the desired height, considering uniform spacing from the ground across all panels. Use temporary supports like blocks to hold the panel in position while adjusting its alignment.
Securing The Panels To The Posts
Fasten the fence panels to the posts using brackets and screws specified for wrought iron fences. Drill pilot holes into the posts to prevent cracking, if required by the material. Attach the brackets to the post first, then secure the panel to the brackets using the screws. Ensure tight connections without over-tightening to avoid damage. Repeat this process for each panel, maintaining a consistent method for even results.
Ensuring Stability And Alignment
Inspect the alignment of each panel after it is secured, verifying that the top edges form a straight and continuous line. Use a level to confirm the panels are plumb and properly aligned with the posts. Make incremental adjustments before proceeding to the next panel to maintain uniformity across the fence. Reassess the stability of the connections once all panels are installed, tightening any loose fasteners as necessary.
Installing Gates
Install gates last to ensure proper alignment with the completed fence. Gates enhance access while maintaining the fence’s overall security and aesthetic.
Choosing The Gate Location
Select the gate location based on accessibility and the landscape. Ensure the chosen area provides enough clearance for the gate to swing freely and avoids obstructions like uneven ground or nearby objects. Confirm gate placement aligns with the overall layout of the fence by measuring distances from adjacent posts.
Attaching The Gate Hardware
Attach the gate hardware to the fence posts securely. Use hinges rated for the weight of the wrought iron gate and position them evenly to distribute the load. Mark the hinge placement on the post, drill pilot holes to prevent splitting, and fasten screws tightly. Install the latch mechanism on the opposite post, ensuring it aligns perfectly with the gate when closed.
Testing The Gate For Functionality
Check the gate for smooth operation by opening and closing it multiple times. Ensure it swings freely without resistance and the latch locks securely. Adjust the hinges or latch if misalignment occurs, maintaining proper spacing for consistent performance. Confirm the gate remains level to prevent wear and tear over time.
Finishing Touches
Ensure a polished and professional look for your wrought iron fence by addressing the final steps carefully. Focus on enhancing durability and tidying up the workspace to complete the project efficiently.
Painting Or Treating The Fence
Painting the wrought iron fence protects it against rust and environmental damage. Use a rust-inhibiting primer before applying weather-resistant paint for the best results. Select oil-based or epoxy paints designed specifically for metal surfaces to ensure long-lasting coverage. Apply the primer and paint evenly using a brush or sprayer in light, consistent coats, allowing sufficient drying time between each coat.
For an untreated fence, consider a protective sealant to preserve its natural finish while adding corrosion resistance. Inspect the entire surface for missed spots after treatment and touch up to avoid weaknesses in durability.
Cleaning Up The Work Area
Cleaning the work area restores order and ensures safety after installation. Gather all tools, materials, and debris, organizing tools for future use and disposing of waste according to local regulations.
Remove any leftover concrete mix, gravel, or unused fencing components and sweep the installation site to eliminate dirt and dust. Inspect the surroundings, checking for loose screws, sharp edges, or any misplaced items that could pose a hazard. A clean work area completes the project, leaving the fence and outdoor space ready for immediate use.
Troubleshooting Common Issues
Identifying and addressing issues during or after the installation process ensures the long-term durability and proper functionality of your wrought iron fence. Below are common problems and their solutions.
Uneven Post Alignment
Check all posts for proper alignment using a level and string line. Misaligned posts affect stability and appearance. Reposition posts by loosening the concrete base with a pry bar and adjusting their position before the concrete fully sets. If the concrete is already cured, remove it completely and re-set the post, ensuring it is plumb and properly aligned.
Loose Panels Or Posts
Inspect all brackets, screws, and post connections to identify loose components. Tighten screws securely without over-tightening to prevent damage. For posts that feel unstable, add extra gravel or reapply concrete around the base for reinforcement. Allow the new concrete to cure for 24-48 hours before applying pressure to ensure stability.
Dealing With Obstructions
Adapt installation plans when encountering obstacles such as tree roots or underground utilities. Use a post-hole digger or smaller tools to work around roots and cut smaller sections only if necessary. For utilities or pipes, relocate the post slightly or consult local authorities for safe adjustments. Avoid forcefully removing major obstructions as this could cause structural or environmental damage.
At Americana Iron Works & Fence, we specialize in expert wrought iron fence installations that ensure durability, security, and a flawless finish. Our team is skilled in troubleshooting common installation challenges, from aligning posts to reinforcing loose panels and adapting to obstructions, ensuring a seamless and long-lasting result. Whether you need custom ironwork, or structural steel services, we provide top-quality craftsmanship tailored to your needs.
Maintenance Tips For Wrought Iron Fencing
Proper maintenance ensures the longevity and appearance of your wrought iron fence. Routine care prevents damage and reduces repair costs over time.
Preventing Rust
Rust affects the durability and look of wrought iron fences. Apply a rust-inhibiting primer and weather-resistant paint, checking the fence annually for chips or scratches. Seal exposed metal areas immediately with touch-up paint to prevent oxidation. Use wax or a rust prevention product to create a barrier against moisture in humid areas.
Regular Cleaning And Repairs
Cleaning removes dirt and prevents debris buildup. Wash the fence every 6 months using water, mild detergent, and a soft cloth or sponge, focusing on intricate areas where grime accumulates. Inspect the fence for loose screws, damaged panels, or cracks in the paint during cleaning, addressing issues promptly. Tighten loose hardware and replace broken components to maintain the structural integrity and appearance of the fence.
Key Takeaways
Installing a wrought iron fence enhances property security, durability, and aesthetic appeal.
Proper planning, including measuring, marking the fence line, and obtaining permits, is essential for a smooth installation process.
Secure fence posts with concrete and ensure proper alignment to create a stable foundation for the fence.
Attach fence panels and gates accurately using the right tools and fasteners for a sturdy, professional finish.
Apply rust-inhibiting paint or protective treatments to extend the fence’s lifespan and maintain its appearance.
Routine maintenance, including cleaning and addressing minor repairs, prevents damage and ensures long-term durability.
Conclusion
Installing a wrought iron fence is a rewarding project that adds elegance, security, and durability to your property. By following the steps carefully and staying organized, you can achieve professional results while saving on installation costs.
Take the time to plan, measure, and prepare thoroughly to avoid setbacks and ensure a seamless process. With proper care and maintenance, your wrought iron fence will remain a stunning and functional feature for years to come.
For a trusted and professional wrought iron fence installation, let the experts at Americana Iron Works & Fence handle the job with precision and care. Our team ensures a seamless installation that enhances your property’s security and elegance.
Contact us for quality wrought iron fence installation, expert craftsmanship, and long-lasting durability!
Frequently Asked Questions
What are the main benefits of a wrought iron fence?
A wrought iron fence offers elegance, durability, and enhanced security. It adds a timeless aesthetic to your property while being highly resistant to weather and damage. Additionally, it provides reliable protection without obstructing visibility.
Can I install a wrought iron fence by myself?
Yes, you can install a wrought iron fence as a DIY project. With proper tools, materials, and preparation, homeowners can save money and customize the installation to fit their space perfectly.
What tools and materials do I need to install a wrought iron fence?
You’ll need materials like wrought iron panels, posts, concrete mix, gravel, and brackets. Tools include a post hole digger, level, measuring tape, shovel, drill, rubber mallet, and protective gear. Proper organization of these items is essential for efficiency.
How do I prepare the area for fence installation?
Define the installation area, measure the perimeter, and identify any slopes. Use stakes and string to mark the fence line and spray paint to indicate post hole locations. Check for obstructions and review local zoning regulations for permits.
How do I ensure the fence posts are installed correctly?
Dig post holes at marked locations, ensuring proper depth and size. Add gravel for drainage, set the posts in concrete, and align them carefully using a level. Allow the concrete to cure for 24-48 hours before attaching panels.
How do I attach wrought iron panels to the posts?
Align panels with the posts, secure them with brackets and screws, and use pilot holes to prevent cracking. Temporary supports can help ensure accurate placement. Double-check alignment with a level for a polished appearance.
When should I install the gate, and how?
The gate should be installed after the fence panels. Choose a suitable location with enough clearance for the gate to swing freely. Attach the hinges and latch securely to the posts, and test the gate for smooth operation.
How can I protect my wrought iron fence from rust?
Apply a rust-inhibiting primer and weather-resistant paint to protect against rust and environmental damage. Inspect the fence regularly and touch up any chips or scratches immediately to prevent corrosion.
What are common issues during installation, and how can I troubleshoot them?
Common issues include uneven posts, loose panels, or obstructions like underground utilities. Use a level to adjust alignment, tighten hardware, and adapt the installation plan to navigate obstacles while maintaining stability.
How do I maintain a wrought iron fence?
Clean the fence every six months with water and mild soap. Inspect for rust, chips, or loose components annually, addressing issues promptly. Reapply rust-proofing treatments and weather-resistant paint as needed to ensure durability.